Leveraging the cloud for fun and games
Friday night, February 21, 2014. That’s when the tretton37 Counter-Strike: Global Offensive fragfest was bound to start. Avid gamers looking to share virtual blood together, were eager to join in from our offices in Lund and Stockholm. A few more would play over the Internet.

The time and place were set. Pizzas were ordered. Everything was ready to go. Except for one thing:
We didn’t have a dedicated Counter-Strike server to host the game on.
Finding a spare machine to dedicate for that one night wasn’t an easy task, given our requirements:
- The host should be reachable from the Internet
- The machine should have enough hardware to handle a CS:GO game with 15+ players
- The machine should be able to scale up as more players join the game
- The whole thing should be a breeze to setup
For days I pondered my options when, suddenly, it hit me:
Where's the place to find commodity hardware that's available for rent, is on the Internet and can scale at will?
The cloud, of course! This realization fell on my head like the proverbial apple from the tree.
Step 1: Getting a machine in the cloud
Valve puts out their Source Dedicated Server software both for Windows and Linux. The Windows version has a GUI and is generally what you’d call “user friendly”. The Linux version, on the other hand, is lean & mean and is managed entirely from the command line. Programmers being programmers, I decided to go for the Linux version.
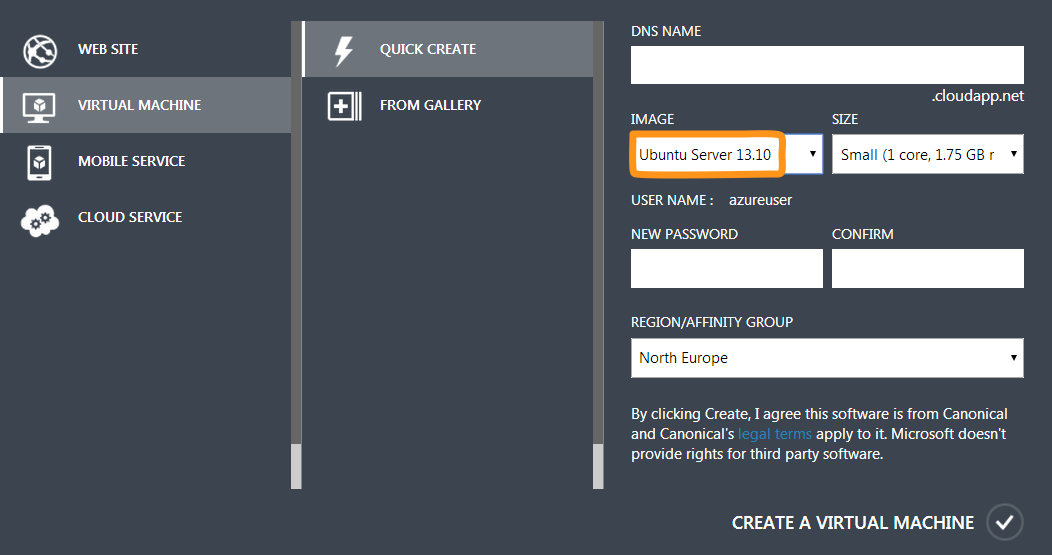
Now, having established that I needed a Linux box, the next question was: which of the available clouds was I going to entrust with our gaming night? Since tretton37 is mainly a Microsoft shop, it felt natural to go for Microsoft Azure. However, I wasn’t holding any high hopes that they would allow me to install Linux on one of their virtual machines.
As it turned out, I had to eat my hat on that one. Azure does, in fact, offer pre-installed Linux virtual machines ready to go. To me, this is proof that the cloud division at Microsoft totally gets how things are supposed to work in the 21st century. Kudos to them.
After literally 2 minutes, I had an Ubuntu Server machine with root access via SSH running in the cloud.

If I hadn’t already eaten my hat, I would take it off for Azure.
Step 2: Installing the Steam Console Client
Hosting a CS:GO server implies setting up a so called Source Dedicated Server, also known as SRCDS. That’s Valve’s server software used to run all their games that are based on the Source Engine. The list includes Half Life 2, Team Fortress, Counter-Strike and so on.
A SRCDS is easily installed through the Steam Console Client, or SteamCMD. The easiest way to get it on Linux, is to download it and unpack it from a tarball. But first things first.
It’s probably a good idea to run the Source server with a dedicated user account that doesn’t have root privileges. So I went ahead and created a steam user, switched to it and headed to its home directory:
adduser steam
su steam
cd ~
Next, I needed to install a few libraries that SteamCMD depends on, like the GNU C compiler and its friends. That’s where I hit the first roadblock.
steamcmd: error while loading shared libraries: libstdc++.so.6: cannot open shared object file: No such file or directory
Uh? A quick search on the Internet revealed that SteamCMD doesn’t like to run on a 64-bit OS. In fact:
SteamCMD is a 32-bit binary, so it needs 32-bit libraries.
On the other hand:
The prepackaged Linux VMs available in Azure come in 64 bit only.
Ouch. Luckily, the issue was easily solved by installing the right version of Libgcc:
apt-get install lib32gcc1
Finally, I was ready to download the SteamCMD binaries and unpack them:
wget http://media.steampowered.com/installer/steamcmd_linux.tar.gz
tar xzvf steamcmd_linux.tar.gz
The client itself was kicked off by a Bash script:
cd ./steamcmd
./steamcmd.sh
That brought down the necessary updates to the client tools and started an interactive prompt from where I could install any of Valve’s Source games servers.
At this point, I could have continued down the same route and install the CS:GO Dedicated Server (CSGO DS) by using SteamCMD.
However, a few intricate problems would be waiting further down the road. So, I decided to back out and find a better solution.
Steam> quit
Step 3: Installing the CS:GO Dedicated Server
Remember that thing about SteamCMD being a 32-bit binary and the Linux VM on Azure being only available in 64-bit?
Well, that turned out to be a bigger issue than I thought. Even after having successfully installed the CS:GO server, getting it to run became a nightmare. The server was constantly complaining about the wrong version of some obscure libraries. Files and directories were missing. Everything was a mess.
Salvation came in the form of a meticulously crafted script, designed to take care of those nitty-gritty details for me.
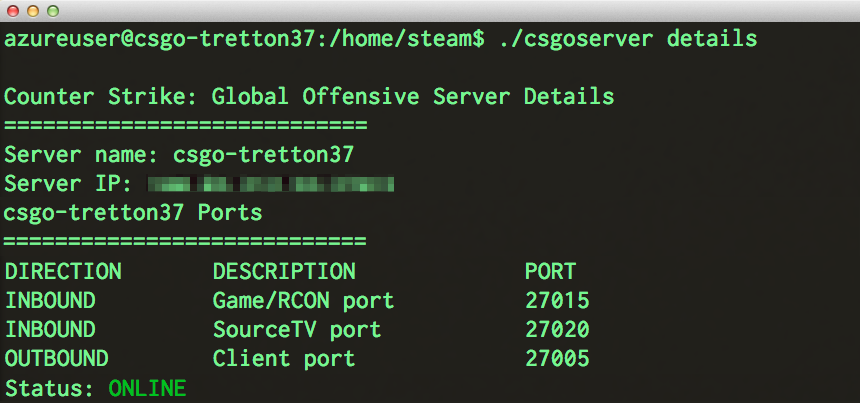
Thanks to Daniel Gibbs' hard work, I could use his fabulous csgoserver script to install, configure and, above all, manage our CS:GO Dedicated Server without pain.
You can find a detailed description how to use the csgoserver up on his site, so I’m just gonna report how I configured it to suit our deathmatch needs.

Step 4: Configuration
The CS:GO server can be configured in a few different ways and it’s all done in the server.cfg configuration file. In it, you can set up things like the game mode (Arms Race, Classic, Competitive to name a few) the maximum number of players and so on.
Here’s how I configured it for the tretton37 deathmatch:
sv_password "secret" # Requires a password to join the server
sv_cheats 0 # Disables hacks and cheat codes
sv_lan 0 # Disables LAN mode
Step 5: Gold plating
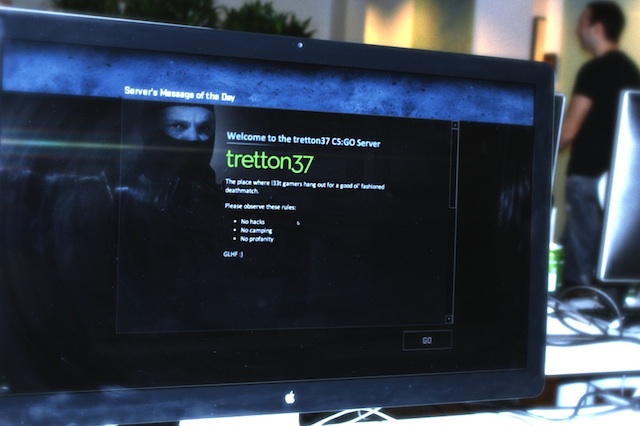
The final touch was to provide an appropriate Message of the Day (or MOTD) for the occasion. That would be the screen that greets the players as they join the game, setting the right tone.
Once again, the whole thing was done by simply editing a text file. In this case, the file contained some HTML markup and a few stylesheets and was located in /home/steam/csgo/motd.txt.
Here’s how it looked like in action:
Step 6: Deathmatch!
This article is primarily meant as a reference on how to configure a dedicated CS:GO server on a Linux box hosted on Microsoft Azure. Nonetheless, I figured it would be interesting to follow up with some information on how the server itself held up during that glorious game night.
Here’s a few stats taken both from the Azure Dashboard as well as from the operating system itself. Note that the server was running on a Large VM sporting a quad core 1.6 GHz CPU and 7 GB of RAM:
- Number of simultaneous players: 16
- Average CPU load: 15 %
- Memory usage: 2.8 GB
- Total outbound network traffic served: 1.18 GB
In retrospect, that configuration was probably a little overkill for the job. A Medium VM with a dual 1.6 GHz CPU and 3.5 GB of RAM would have probably sufficed. But hey, elastic scaling is exactly what the cloud is for.
One final thought
Oddly enough, this experience opened up my eyes to the great potential of cloud computing.
The CS:GO server was only intended to run for the duration of the event, which would last for a few hours. During that short period of time, I needed it to be as fast and responsive as possible. Hence, I went all out on the hardware.
As soon as the game night was over, I immediately shut down the virtual machine. The total cost for borrowing that awesome hardware for a few hours? Literally peanuts.
Amazing.
Enrico Campidoglio
Hi, I'm Enrico Campidoglio. I'm a freelance programmer, trainer and mentor focusing on helping teams develop software better. I write this blog because I love sharing stories about the things I know. You can read more about me here, if you like.


